Mountain Bike Trek Bike
A practical step-by-step guide to mountain bike trek bike, including preparation, instructions, common issues, tips, and next steps.
Mountain Bike Trek Bike
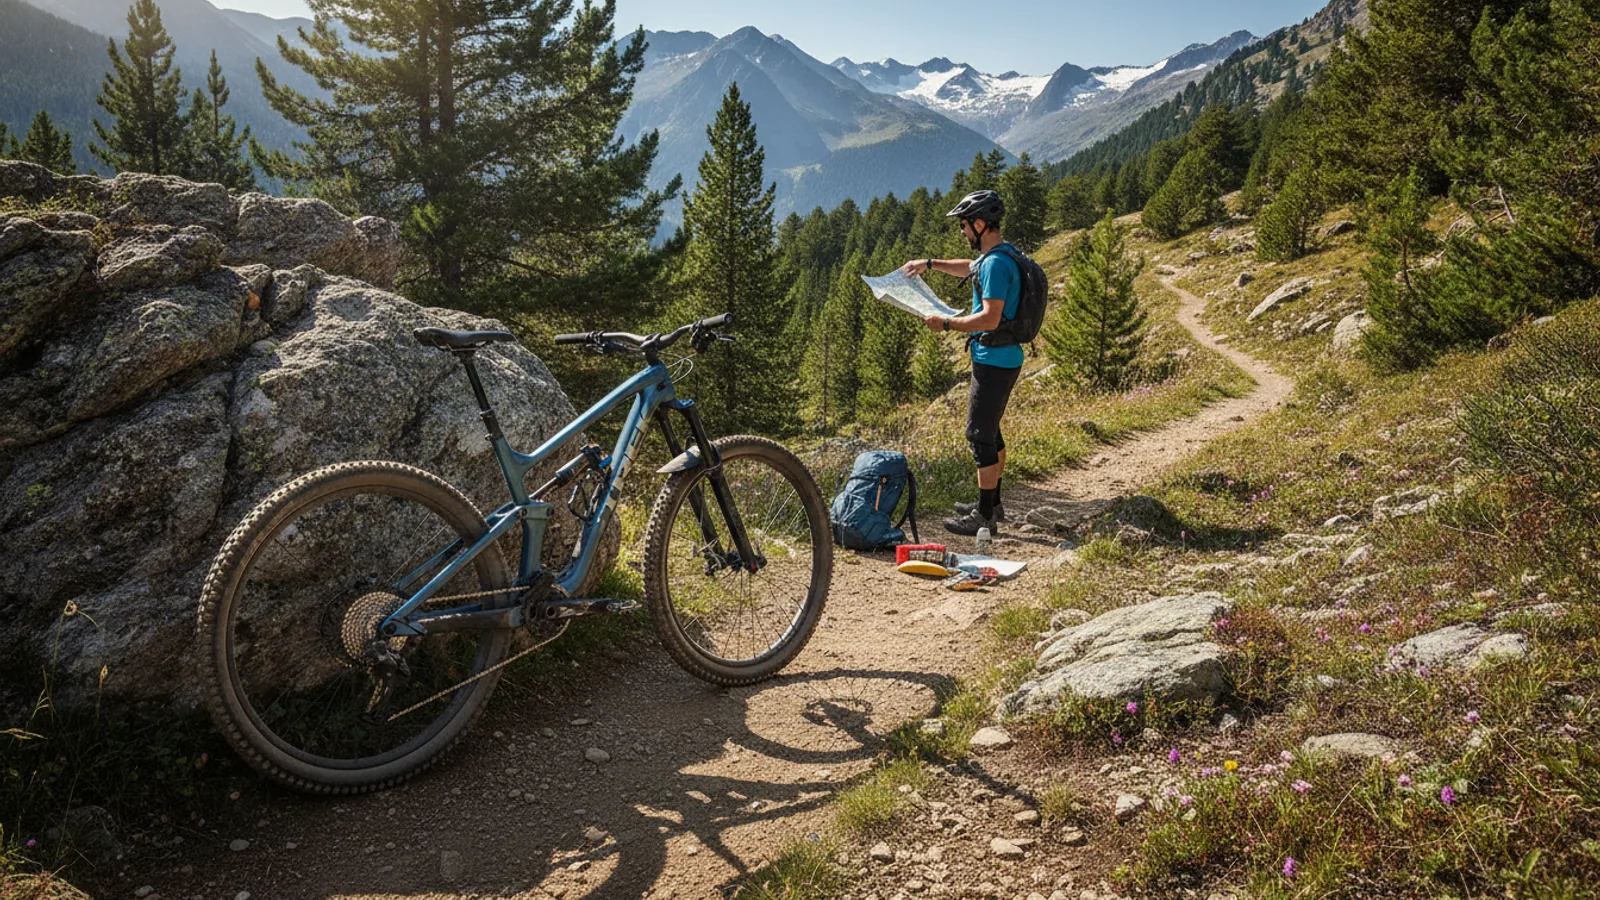
This guide shows you how to plan and complete your first mountain bike trek. A mountain bike trek, often called bikepacking, is a multi-day ride where you carry all your own gear. It’s a fantastic way to explore remote trails and beautiful landscapes. We'll walk you through everything from choosing a route and packing your bike to navigating the trail and handling common problems. This guide is for riders who are comfortable on singletrack and want to try their first overnight adventure.
Fast Answer
- Key to success: Careful planning is everything. Your route, your gear, and your fitness must be well-matched before you set off.
- First step: Choose a well-known, shorter route (1-2 nights) for your first trek to build confidence and test your setup.
- Essential gear: A reliable bike, on-bike luggage (bikepacking bags), a repair kit, and dependable navigation tools.
Before You Start
A successful mountain bike trek relies on good preparation. Before you even think about pedalling, you need to have the right equipment and a solid plan. This section covers the essentials you'll need to gather and the critical checks to perform.
What You Need
- A Suitable Mountain Bike: A reliable hardtail or full-suspension bike that has been recently serviced. Ensure it fits you well and is comfortable for long hours in the saddle.
- Bikepacking Bags: You'll need luggage that attaches directly to your bike without racks. The standard setup includes a saddle pack, a frame bag, and a handlebar roll.
- Navigation Tools: A dedicated GPS cycling computer (like a Garmin or Wahoo) is best. A smartphone with a mapping app (like Komoot or OS Maps) and a power bank is a good alternative. Always carry a physical map and compass as a backup.
- Repair Kit: A comprehensive kit for trailside fixes. This must include a multi-tool, tyre levers, puncture repair kit, a spare inner tube, a pump, a chain tool, and a spare quick-link for your chain.
- Camping Gear (if applicable): If you're not staying in accommodation, you'll need a lightweight tent or bivvy bag, a sleeping bag, and a sleeping mat.
- Clothing: Layered cycling kit appropriate for the expected weather, including waterproofs. Pack a warm, dry set of clothes for the evening.
- First-Aid Kit: A small, personal kit with plasters, antiseptic wipes, pain relief, and any personal medication.
- Food and Water: Enough water capacity for the longest stretch between refills (at least 2 litres) and high-energy food for the duration of your trip, plus some emergency rations.
Step-by-Step Instructions
Follow these steps to plan and execute a safe and enjoyable mountain bike trek. We'll start with the planning phase at home and move all the way through to what to do on the trail.
Step 1: Plan Your Route Carefully
Your route is the heart of your trek. For your first trip, choose a well-established route that is within your physical capabilities. Aim for a 1-2 night trip, covering a distance you'd be comfortable riding on consecutive days.
Use online tools like Komoot, Ride with GPS, or Trailforks to find routes and plan your own. Pay close attention to the total distance, elevation gain, and terrain type. Look for key points along the route: sources of fresh water, potential food resupply stops (shops or pubs), and your planned overnight locations (campsites, bothies, or pre-booked accommodation). Download the route as a GPX file for your navigation device and have offline maps saved on your phone.
Step 2: Prepare and Service Your Bike
Your bike is your most important piece of equipment. It needs to be in perfect working order before you set off into a remote area. A mechanical failure miles from help can turn an adventure into a serious problem.
Give your bike a thorough service, or have a professional bike shop do it for you. Check the following:
- Brakes: Check pad wear and ensure they are working powerfully. Bleed hydraulic brakes if they feel spongy.
- Gears: Ensure they shift smoothly across the entire cassette. Check for a worn chain or cassette.
- Tyres: Check for cuts or excessive wear. Ensure they have fresh sealant if you're running a tubeless setup. Inflate to the correct pressure for the terrain and your loaded weight.
- Bolts: Use a torque wrench to check that every bolt on your bike is tightened to the manufacturer's specification, especially on your stem, handlebars, and seatpost.
Once serviced, fit your empty bikepacking bags to the bike to ensure they attach securely and don't rub on any moving parts like your wheels or suspension.
Step 3: Pack Your Gear Strategically
How you pack is almost as important as what you pack. A well-balanced bike is safer and more comfortable to ride. The goal is to keep the centre of gravity low and distribute weight evenly.
- Handlebar Roll: This is for bulky but lightweight items. Pack your sleeping bag, sleeping mat, and evening clothes here.
- Frame Bag: This is the best place for heavy, dense items to keep the centre of gravity low. Pack your tools, spares, pump, and food here.
- Saddle Pack: This is for medium-weight items you don't need to access frequently. Spare clothing layers, cooking equipment, and your tent or bivvy can go here.
- Accessory Bags (Top Tube/Stem Bags): Use these for items you need to access while riding, like your phone, snacks, and sunglasses.
Lay all your gear out on the floor before you pack. Be ruthless. Ask yourself if you truly need each item. Every gram counts. Once packed, do a short test ride around your local area to check for any issues with balance or bag movement.
Step 4: Navigate on the Trail
Once you are on your trek, navigation is your primary task. Your GPS device or phone should be your main tool. Make sure it's fully charged and that you have a power bank to recharge it.
Follow the pre-loaded route on your screen. Check it regularly, especially at trail junctions, to ensure you haven't taken a wrong turn. Don't rely on it blindly; pay attention to your surroundings and look for trail markers or landmarks that match your map.
If you think you're lost, stop immediately. Don't push on hoping to find the trail. Get out your map and compass (or the map on your phone). Try to identify your last known position and look for features around you (hills, rivers, forests) to pinpoint your current location. If you must, retrace your steps to your last known point on the trail.
Step 5: Manage Your Energy, Food, and Water
A multi-day trek is a marathon, not a sprint. You need to manage your energy levels carefully. Ride at a steady, sustainable pace. Take short breaks every hour or so to rest, eat a snack, and drink some water.
Eat before you get hungry and drink before you get thirsty. This is crucial for avoiding "bonking" – a sudden loss of energy caused by depleted glycogen stores. Carry a mix of high-energy snacks like cereal bars, dried fruit, and nuts to eat on the go. Plan for a more substantial meal at lunch and in the evening.
Water is critical. Know where your next water source is and make sure you have enough to get there. If you are collecting water from streams or rivers in the wild, you must treat it using a water filter or purification tablets to avoid getting sick.
Step 6: Handle Trailside Repairs
It's very likely you'll face a mechanical issue at some point. Staying calm and knowing how to use your tools is key. The most common problems are punctures and chain issues.
- Punctures: If you have a tubeless setup, the sealant may fix small holes automatically. For larger holes, you'll need to use a tubeless plug (a "worm"). If that fails, or if you're using inner tubes, you'll need to remove the tyre and patch or replace the tube.
- Broken Chain: Use your chain tool to remove the broken link. Then, insert a new quick-link to join the chain back together. It's a five-minute job if you've practised it at home first.
Before your trip, practice these basic repairs at home so you are confident doing them on the trail. Watch online videos to learn the techniques.
Quick Reference
| Situation | Use this | Why |
|---|---|---|
| Flat tyre (tubeless) | Tubeless plug tool and pump | A fast way to fix larger holes that sealant can't handle, without removing the wheel. |
| Broken chain | Chain tool and spare quick-link | Allows you to remove the damaged link and reconnect the chain to keep riding. |
| Feeling lost or off-route | Stop, check GPS, and consult backup map/compass | Prevents you from getting further lost and allows you to calmly relocate the trail. |
| Sudden energy drop ("bonking") | Stop, eat a high-sugar snack, then have a proper meal | Rapidly raises blood sugar and replenishes energy stores to allow you to continue. |
Common Problems When You Mountain Bike Trek
Even with the best planning, things can go wrong. Here are some common issues and how to deal with them.
- Bad Weather: The weather in the UK mountains can change in an instant. Always carry full waterproofs (jacket and trousers). If a storm rolls in, assess your situation. It may be safer to find shelter and wait it out, or even cut your trip short, than to push on in dangerous conditions like high wind or lightning.
- Rider Fatigue: Overestimating your daily distance is a classic beginner mistake. If you're exhausted, it's better to stop early for the day than to risk an accident. Listen to your body. There's no shame in adjusting your plan on the fly.
- Mechanical Failures: Sometimes a problem is beyond a simple trailside fix, like a broken frame or a major wheel issue. This is where your pre-trip planning pays off. You should have a "bailout plan" – knowing the nearest roads or villages from which you could call for help or arrange transport.
- Gear Issues: A broken tent pole or a leaking sleeping mat can ruin a night's sleep. Carry a small repair kit for your gear, including tenacious tape or duct tape, which can fix a surprising number of problems.
Advanced Tips for Mountain Bike Trekking
Once you have a few treks under your belt, you might want to push your adventures further. Here are some tips for more experienced riders.
- Go Ultralight: The less weight you carry, the faster and further you can ride. This involves critically analysing every single item you pack and often investing in specialised, lightweight gear. This can be expensive, but it transforms the riding experience.
- Master Wild Camping: Learning to wild camp responsibly opens up huge possibilities for route planning. In Scotland, it is generally permitted as part of the Land Reform Act. In England and Wales, you technically need the landowner's permission. Always follow the "Leave No Trace" principles: arrive late, leave early, camp out of sight, and take all your rubbish with you.
- Plan an Expedition: For a week-long trip or longer, you'll need to plan food and supplies more carefully. Incorporate towns or villages into your route every few days to restock. This also gives you a chance to have a proper meal and dry out your gear.
- Off-Grid Power: For longer trips away from mains power, consider a dynamo hub. This is a special front wheel hub that generates electricity as you ride, allowing you to charge your GPS and phone.
Mountain Bike Trek Bike FAQ
What kind of mountain bike is best for trekking?
Both hardtails and full-suspension bikes can be great. Hardtails are often preferred because they are simpler, lighter, have fewer moving parts to go wrong, and have more space in the main triangle for a frame bag. However, a modern short-travel full-suspension bike can provide much more comfort on rough terrain over long days.
How much should my packed gear weigh?
This varies hugely, but a good target for a beginner's summer trip (including camping gear) is to keep the total weight of your gear, excluding food and water, under 10-12 kg. Ultralight experts can get this down to under 5 kg.
Can I do a mountain bike trek alone?
Yes, but it carries more risk. You should only consider it once you are very experienced, confident in your mechanical and navigation skills, and have a reliable emergency plan. For your first few trips, it's much safer and more enjoyable to go with a friend.
How do I charge my electronics on the trail?
For a 1-2 night trip, a good quality power bank (around 10,000-20,000 mAh) is usually sufficient to keep a phone and GPS device charged. For longer trips, you might need to plan a stop at a café or campsite with power, or invest in a dynamo hub.
Final Checklist for Your Mountain Bike Trek
Before you walk out the door, run through this final checklist to make sure you haven't forgotten anything critical.
- Bike Check: Tyres inflated? Chain lubed? Brakes working? All bolts tight?
- Gear Check: All bags securely attached? Do you have your repair kit, first-aid kit, and waterproofs?
- Navigation Check: Route loaded onto your GPS/phone? Is everything fully charged? Do you have your power bank and backup map?
- Weather Check: Have you checked the most up-to-date mountain weather forecast for your specific area?
- Food & Water: Do you have enough food for the first leg of your journey and a full water bottle/bladder?
- Safety Check: Has someone been told your exact route and your expected return time?